Showing posts with label Tutorial. Show all posts

Thursday, February 28, 2013

T.N.T. Thursday


Today I am putting up a fairly simple T.N.T. Thursday tutorial. Making a paper flower using card stock. Although it may be simple, it will give you a WOW factor on a card, 3-D project, or your scrapbook pages. 


 Here are the tools you will need.
 

 I used Baja Breeze for my flower, but the great thing about making your own flowers, is the ability to coordinate your 
flowers with your projects.

1. Cut 5 petals from the CS using the Blossoms punch
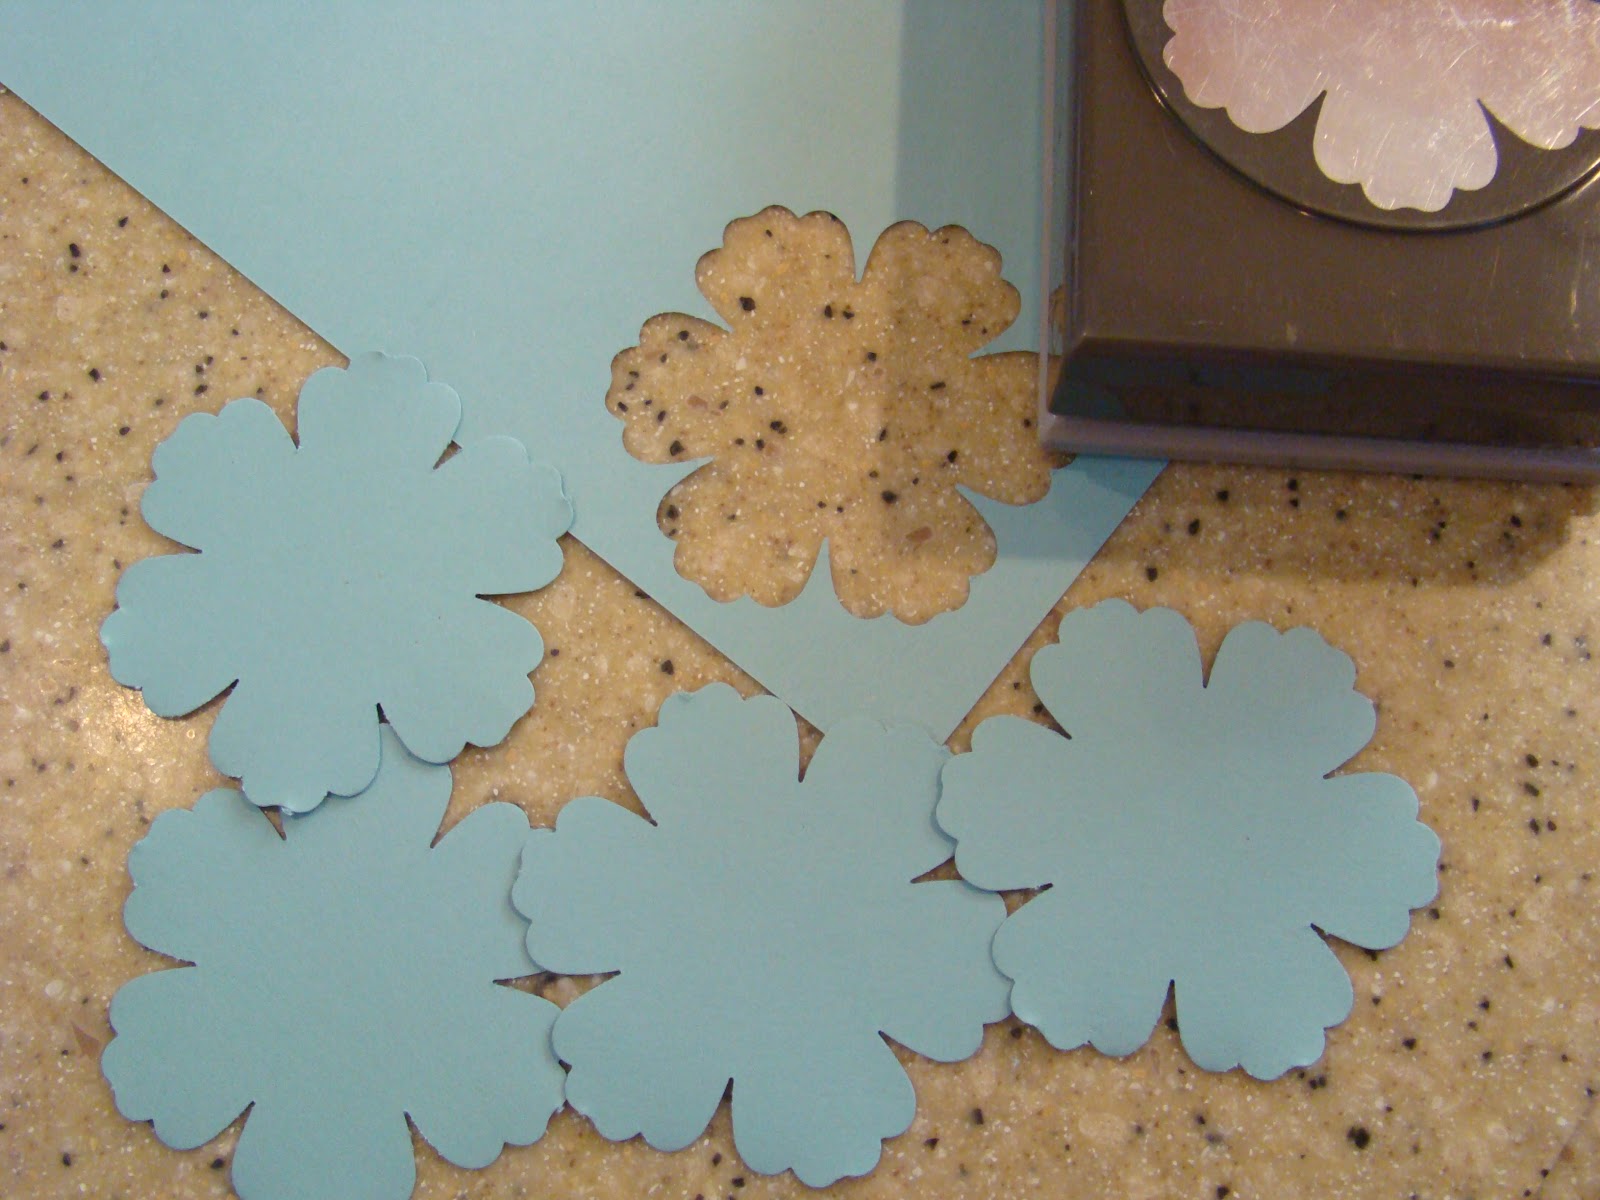


 2. After you have punched your petals, take a SU spritzer filled with water and gently spray each petal until it is wet. This is an important step. The flowers need to be wet enough to have the right texture when finished and stay shaped.


 3. Take each petal and pierce a hole in the center of each one.


 4. Layer the flowers. I staggered mine, but it's not necessary. Attach them together with a small brad.


5. Now the fun part. Take the wet flower and "scrunch" each petal being careful not to tear the CS. 
Then scrunch the entire unit together.
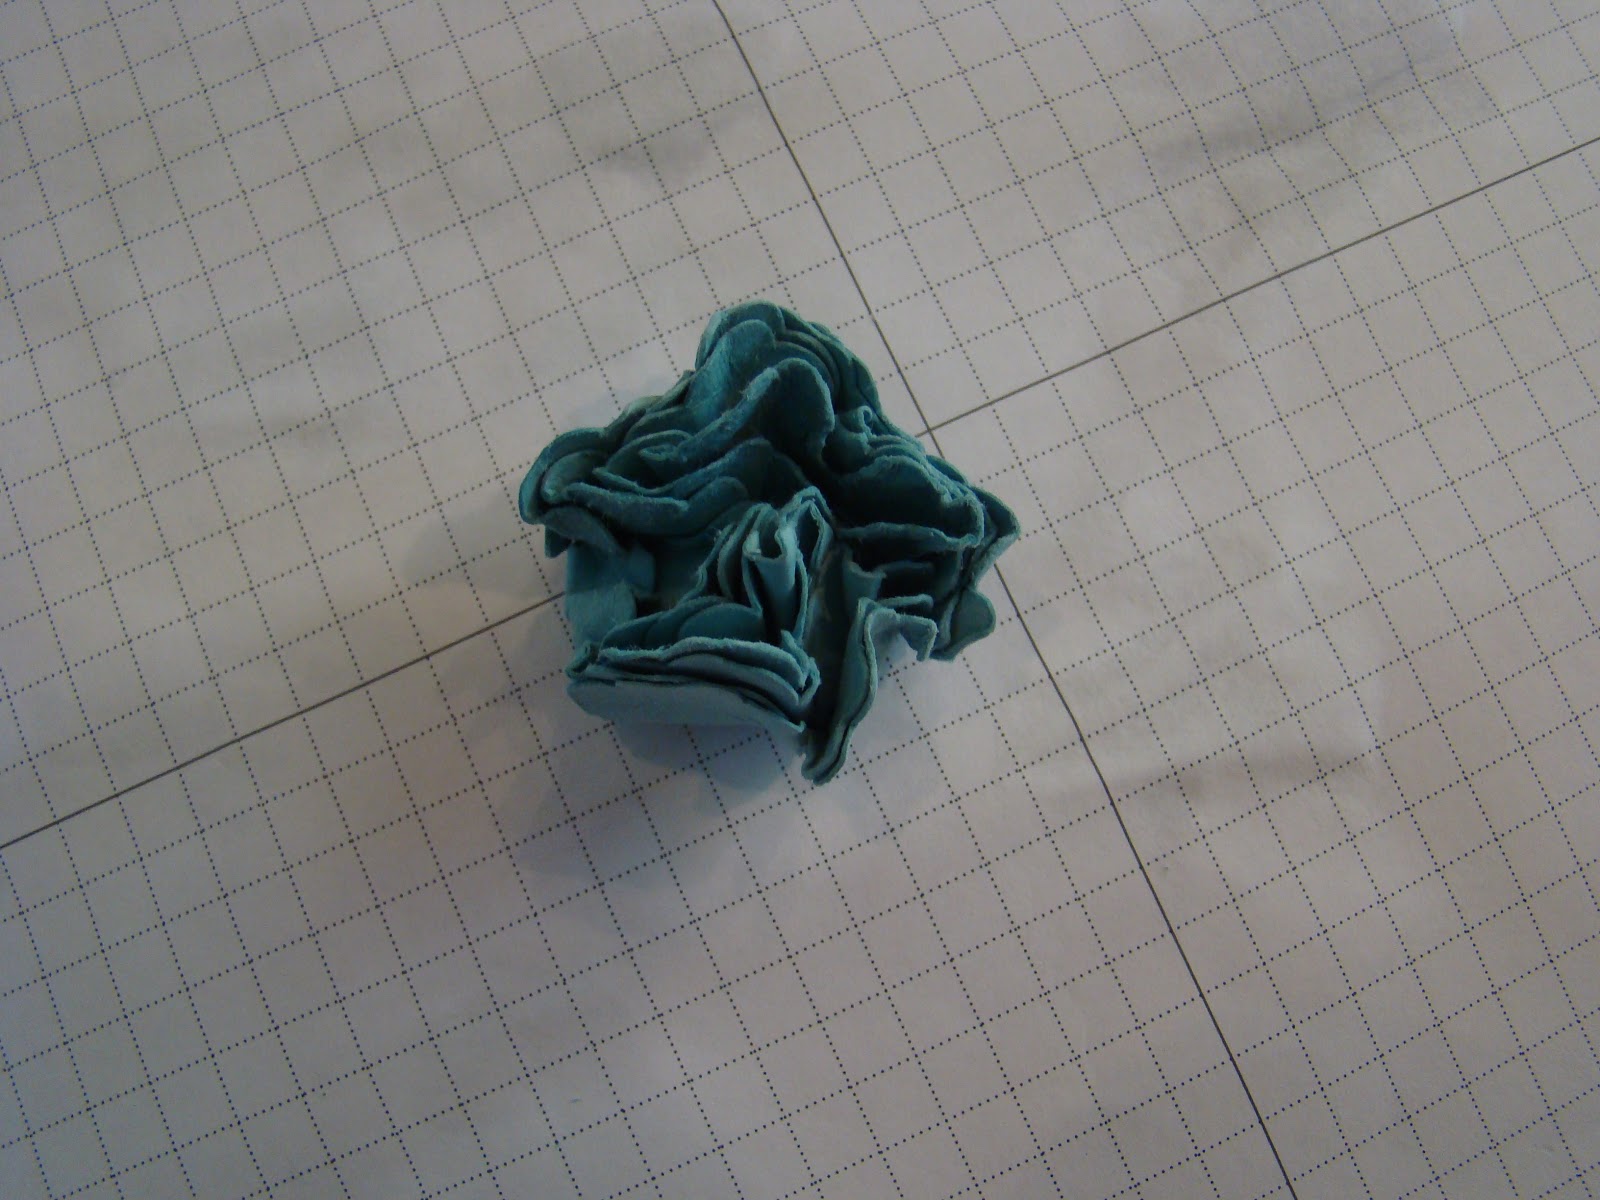


Shape the flower. It can be as tight or loose as you desire

Now allow the wet flower to dry completely before adding it to your project. 
As the flower dries it will stiffen up and hold its shape. 


And here is what your finished flower will look like.


Have fun making these. Why not try making a CS Floral bouquet. Just make each flower using different colored card stock and attach them to pipe cleaners with a hot glue gun. 
Put them in a vase and enjoy.

 NO WATER NEEDED!


Thanks for stopping by and have a CRAFTY week!


Thursday, February 14, 2013

T.N.T. Thursday


Especially for You Pocket Slider Card

Today's tutorial  is one that can be used for any occasion just by changing the papers, embellishments and sentiment. This particular one is used as a card, but you could add a cocoa or hot cider packet, or even small Ghirardelli square with a glue dot. So cute!

Instructions

Cut a piece of  Real Red card stock 5 1/2" X 8 1/2"

Score it in landscape position at 1/2" and 4 1/2"

.

Run a piece of Sticky Strip down the edge of the  4 1/2" side. 
Fold over making sure to seal the edge.


Using More Amour DSP, cut a strip 2 1/2" X 8 1/2" for the belly band.


Wrap the band around the main piece, making sure that the ends meet 
in the middle at the back overlapping slightly. Lightly score the edges. This band should be tight, but be able to be  sliped off the main card. Run either a line of  Mono liquid adhesive or 
 Snail down the open edge and seal.


 Stamp the Especially for You sentiment on the lower right corner in black Ink.

  For the inside of the slider, cut a piece of Whisper White CS, 3 3/4" X 5 1/4". Cut a coordinating piece of DSP 3 1/2" X 3 1/2" and adhere to the top half. You can add a sentiment on the bottom half or use the packets or candy to complete it.


To make a hole on both sides of the packet for the ribbon to be inserted. I used one of the Itty Bitty Punch pack punches for this hole.


Cut a piece of coordinating ribbon approximately 16" long. I used the Pool Party ribbon from the Sycamore Ribbon and Button Pack I received free for my $50 order during our Sale-a-Bration promotion. Place the ribbon through the both holes making sure the ends are even. Slip the card between the ribbon and push card into the packet holder and tie a simple bow. The card will have the ribbon on either side so it can be pulled out using the ribbon as shown in the photo below.


I stamped 4 hearts with the Hearts a Flutter stamp and matching die to decorate the band.   
Pool Party and Real Red ink and CS were used on this to coordinate with the DSP.


Assemble the hearts on the front of the band and add  rhinestones to the middle of the solid hearts and to the letter "I" on the sentiment.

I hope you enjoy making this versatile packet and have a CRAFTY week.


Thursday, February 7, 2013

T.N.T. Thursday

  
Today is the day! This is my first tutorial! I decided on this cute little tea bag holder/card inspired by Linda Heller over at Stamping School. ENJOY!


Cut a piece of Primrose Petals CS  3 1/2" by10 1/2 ". Place it in the landscape position on your score board and score at 3 1/2" x 7".


Place the upper right hand corner on your paper cutter and cut from the top
just down to the scored line.


This is what your cut should look like. Add a piece of Sticky Strip to 
the bottom straight edge.


  Fold over and press to set. This will make the pocket for the tea bag.


Now you are ready to embellish the inside.The fun part! Punch one 1 3/4" Scallop from the Tea for Two DSP,  and one 1 1/2 " Circle from Primrose Petals. Using the 7/8 Scallop, punch a flower from the DSP. I added paper piercing to the solid circle for some interest. Adhere pieces with Snail Adhesive. Add a Stampin' dimensional to the scalloped flower and place this in the center of the pierced circle. Put Snail on the right half of the assembled piece and position it to the right side of the holder. Insert your tea bag. 


                        Cut a piece of Whisper White card stock 2 3/4" x 2 3/4". I chose a sentiment from
                                          Thoughts and Prayers inked Lucky Limeade.


To keep the holder closed, cut a one piece of Primrose Petals stitched ribbon at 15". Wrap the ribbon evenly around the center of  the holder. Place some adhesive under the ribbon on back and front to keep it in place. Tie it into a simple bow, trim ends.


Layer a 3x3 piece of Lucky Limeade CS with a 2 3/4 "x 2 3/4" DSP  and adhere it to the front.


To finish this little card/holder,  I stamped the Four Frames in Primrose Petals ink and punched it with the matching Decorative Labels Punch . Teeny Tiny Wishes sentiment inked in Lucky Limeade finishes it up. Place a dimensional to the back and center it on the front. Also added was a small flower from DSP punched with the Itty Bitty Punch pack and Pearl Basic Jewel.


This card measures 3 1/2 " square so it will not fit in a 3x3 envelope. No problem. I used my Simply Scored Scoring Tool with the Simply Scored Diagonal Plate to create a matching envelope  measuring 3 3/4" x 3 3/4". This card will not be able to mailed in this size envelope, but can be placed inside a A2  and adding extra postage.


I hope you try this cute little Tea Bag holder for T.N.T. Thursday. Have fun, be creative and I would love to hear your opinions on my first tutorial.
~Bernadette~

1000 Piece Puzzle

  It is a beautiful puzzle,but we probably will NOT do one again. The 500 pc. ones are much more relaxing. Heres hoping you all have a great...