Today is the day! This is my first tutorial! I decided on this cute little tea bag holder/card inspired by Linda Heller over at Stamping School. ENJOY!
Cut a piece of Primrose Petals CS 3 1/2" by10 1/2 ". Place it in the landscape position on your score board and score at 3 1/2" x 7".
Place the upper right hand corner on your paper cutter and cut from the top
just down to the scored line.
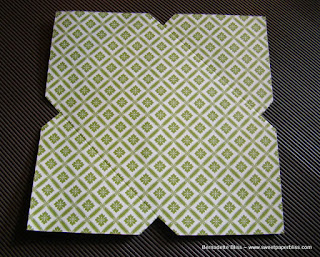
This is what your cut should look like. Add a piece of Sticky Strip to
the bottom straight edge.
Fold over and press to set. This will make the pocket for the tea bag.

Cut a piece of Whisper White card stock 2 3/4" x 2 3/4". I chose a sentiment from
Thoughts and Prayers inked Lucky Limeade.
To keep the holder closed, cut a one piece of Primrose Petals stitched ribbon at 15". Wrap the ribbon evenly around the center of the holder. Place some adhesive under the ribbon on back and front to keep it in place. Tie it into a simple bow, trim ends.
Layer a 3x3 piece of Lucky Limeade CS with a 2 3/4 "x 2 3/4" DSP and adhere it to the front.
To finish this little card/holder, I stamped the Four Frames in Primrose Petals ink and punched it with the matching Decorative Labels Punch . Teeny Tiny Wishes sentiment inked in Lucky Limeade finishes it up. Place a dimensional to the back and center it on the front. Also added was a small flower from DSP punched with the Itty Bitty Punch pack and Pearl Basic Jewel.
This card measures 3 1/2 " square so it will not fit in a 3x3 envelope. No problem. I used my Simply Scored Scoring Tool with the Simply Scored Diagonal Plate to create a matching envelope measuring 3 3/4" x 3 3/4". This card will not be able to mailed in this size envelope, but can be placed inside a A2 and adding extra postage.
I hope you try this cute little Tea Bag holder for T.N.T. Thursday. Have fun, be creative and I would love to hear your opinions on my first tutorial.
~Bernadette~


1 comment:
Totally AWESOME tutorial. Photos and instructions were detailed and clear. Congrats on a job well done!!
Post a Comment