Thursday, March 28, 2013

T.N.T. Thursday

Welcome back to another T.N.T. Thursday. Today's project is something that has been around for some time, but I was thinking about Spring, friendships and flowers this past week, so I decided to combine them in this tutorial.
This card incorporates a sweet Corner Bookmark that slips off and can be used to mark a page in a book, a magazine or even a Stampin' Up! catalog.  :>}


Let's get started! 


 Some of the products used on this Card/Bookmark


1. Stamp and cut your floral pieces, stamp your sentiment and cut that 
and the larger Label and set aside. Also cut your card layers and bookmark piece. 
This card is a side fold. 

Card: 4 1/4" x 5 1/2", 4"x 5 1/4", 3 3/4" x 5"
 Bookmark: cut at 4"x4"


I stamped and used the Big Shot to cut the flowers and stems from the Secret Garden Bundle.  I did cut more then I would probably use, but I like to have a variety just in the event my design takes me another direction then what I planned.


2. Now you can start assembling your card base.

I choose to paper pierce the cut Labels Framelits pieces, but it certainly is not necessary.
**A note on the stamped sentiment. Just allow yourself room to place the flowers and leaves so they do not cover the sentiment. In my example, I stamped it on the upper half of the framelit.


3. Complete the front of the card adding your sentiment, framelit layer, flowers and leaves.
I used Stampin' Dimensionals under the sentiment base and on the flowers. I attached the leaves using a two way glue pen. And added some SU Basic Pearls to the centers of the flowers.


4. Now we can assemble the bookmark.

Fold one side of the 4x4 piece so it forms a triangle making sure the triangle is even at the bottom. 
(This is how we did the Triangle cards several weeks ago)

I then ran the straight side through the Big Shoot with the Large Scallop Edgelit. 
This certainly can be left as is or you could use a border edge punch.


5. Cut a thin strip of paper and run SNAIL up one side making sure
there is no residue on the edges of the strip.

 Place the sticky side up and under the folded triangle piece.
 This is will keep the center of the triangle together.
 Trim with paper snips close to the bottom edge so it is not visible.


6. Next  fold the glued scallop edge to the base of the bookmark.


7. Embellish, the fun part,  and your are finished. Well almost...


8. Write a sweet note to a special friend on the inside. 
Slip the bookmark on the corner of the card, and then pop your 
special little gift into the mail. 


I hope you enjoyed this tutorial and will give it a try. As always, I would love to hear from you.

Have a blessed week and stay CRAFTY!

Bernadette


Wednesday, March 27, 2013

Congratulations


This card was made for the MOJO286 sketch over at Mojo Monday.
 I used several products on this card for the first time. The stamp from the Perfect Punches 120516 and the Delicate Designs Folder 127023. I hope to get more use out of them both.


RECIPE

 Card: 5"x 5"

Papers: Very Vanilla 101650, Primrose Petals 126841, Tea for Two DSP 129311

Ink: Lucky Limeade

Sweet Additions: Square Lattice Folder 119976, 3/8" Stitched Satin Ribbon 126844
Designer Build a Brad 129329, Pearl Basic Jewels 119247

Modern Label 119849, Itty Bitty Shapes Punch Pack 118309

Glue Dots 103683, Multipurpose Liquid Glue 110755, Stampin' Dimensionals 104430


Thank you for stopping by. Have a blessed and CRAFTY week!

BERNADETTE

Tuesday, March 26, 2013

A Tissue Box?


Well, no, it's not a tissue box, but a card that was inspired
 by a tissue boxes colors.

I have been looking at the colors on a tissue box since I placed it in my bedroom. Even the background design is somewhat hexagonal. I have been thinking of it for days and needed to put a project up for today. Even before I had my coffee, yes I said my COFFEE, I designed this card.

I love the fresh , modern look of the Basic Gray and Rich Razzelberry combination. My advice, look around you, you never know where your inspiration will come from.
 What do you think?

Recipe

Papers: Basic Gray 121044, Rich Razzelberry 115316
Twitterpated DSP 125406, Whisper White 100730

Stamp: Quint-Essentail Flower 126790, Friendly Phrases 126151

Ink: Basic Gray 126981, Rich Razzelberry 126950

Punches: 2 3/8" Scallop Punch  118874, 1 3/4" Scallop Circle 119845
1" Circle 119868, 3/4" Circle 119873

Sweet Additions: 
Honeycomb Embossing Folder 129378,
Finishing Touches Edgelits 127010 Rhinestone Basic Jewels 119246

 AND
LOTS of  Stampin' Dimensionals!  104430


Have a great and CRAFTY day! I'm off to have my coffee... 

Bernadette

Monday, March 25, 2013

Congratulations


My card today is using another sentiment from Sassy Salutation 126707.
 I just love the font in this set. So trendy and well, sassy! 

This card went together fairly  quickly. If you need a quick card for a Class or Make and Take, this would certainly work. You wouldn't  necessarily need three layers on the flag and the DSP could be added to a Midnight Muse card base.

RECIPE

Paper: Print Poetry DSP 129312, Midnight Muse 126843, Crumb Cake 120953
Summer Starfruit 126839,  Very Vanilla 101650

Stamps: Sassy Salutations 126707, Itty Bitties 128939

 Ink: Midnight Muse 126860

Sweet Extras:  Small Soda Pop Top 129388 , Rhinestone Basic Jewels 119246

Have a wonderful and CRAFTY week!

~ BERNADETTE ~


Sunday, March 24, 2013

Happy Birthday


 I had this card completed yesterday and was going to post it on Monday, but since I was one project short for the week, I thought I would put it up today.

Yesterday I had posted the Wedding Favor Box using Certainly Celery (105125) and Pretty in Pink (100459) and had those colors still on my work space. Thus, a card using those colors. Using the  gradient technique on the Blooming with Kindness (126422) gave the image some interest since it was stamped in Crumb Cake ink (126975). The sentiment, Perfect Punches (120516) is in  Early Espresso (126974)  and punched with the Extra- Large Oval (119859).

For the gradient effect on the image, I pounced Certainly Celery (126958) with a sponge dauber randomly. I embossed the pink layer with the Vintage Wallpaper Folder (120175) to add some depth to the card. The image is finished off using the Stampin' Distress Tool ( 127562), adding Basic Jewels Rhinestones for the "bling factor". The gorgeous ribbon is the 1 1/4" Two-Tone Ribbon (129294) from  the Spring Catalog. This is my first time using it, although I have had it for awhile. I love it. Now I need to find some new projects to use it on!

I hope you have a wonderful Sunday!

Saturday, March 23, 2013

Wedding Favors


 It seems like yesterday got away from me and I didn't get a project up like I wanted to. Sorry.

Today's project is one that I have had rolling around in my head for several days. I guess I have been thinking weddings. I have2 daughters who have Anniversaries in April and one this coming September. I had made all the favors for all three weddings. I guess I was missing doing that!

The 2013 Colors of the Year for weddings is Mint Green and Pink. I'm not usually a pastel gal, but these two colors together do speak soft and vintage, which I do like. Linda Heller, my upline,  had sent me this  Kraft Gift box and die cut Lolly about 6 weeks ago. She had designed the box around her Everybunny stamp set tutorial. I had put this away to make up at a later time, but when I was thinking "weddings", I knew exactly how I would use it. Thanks Linda!

The paper on the box are from the Spring catalog, Tea for Two DSP,
 Certainly Celery CS and Pretty in Pink CS.
The beautiful ribbon is SU's 3/8" Striped Organdy Ribbon in Old Olive. I also used Basic Pearls, the large Butterfly and Bitty Butterfly, Large Circle Scallop, Scallop punches and "smashed" the Soda Pop Tops. I stamped the 1" circle with the words from the Collage Curios stamp set. I used Multipurpose Liquid Glue, glue gun and Stampin' Dimensionals to hold things together.

Now how cute this would be to use as favors. You could put a piece of wedding cake or some sweet candy choices inside. Chocolate, of course!

Of course , this box can be used for more then favors. How would you use it? 

Have a great weekend and stay CRAFTY!


Thursday, March 21, 2013

T.N.T. Thursday

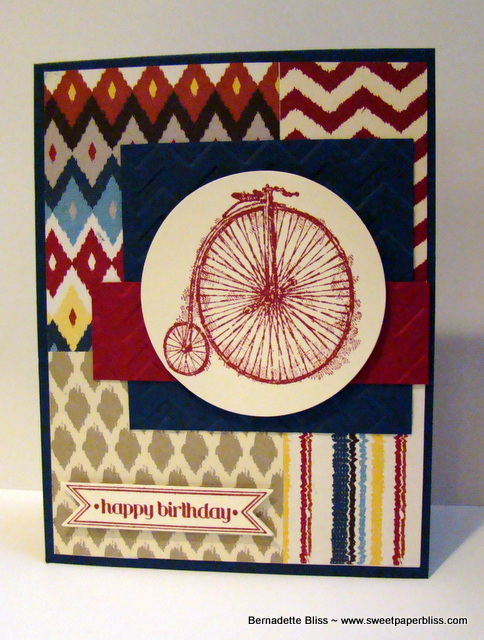
Today's tutorial is on a neat way to to get a quick set of 4 cards "up and running". A fellow demonstrator, Jackie Bolhuis, demonstrated this technique last year. I came across it on our SU Stampin Connection site and knew I needed to try it myself and share it with my blog friends.

I don't know about you, but I sometimes have trouble mixing and matching patterns. Although Stampin'Up!s papers lend themselves very well to doing that, it usually is out of my comfort zone. This technique allowed me to go outside the box creatively. I hope you will give this a try and see how much fun it can be.


Lets get started

Pick four sheets of Designer Paper and cut them at 4 x 5  1/4" each. I chose to use Parker's Patterns from the Spring Catalog. I have three sons and three son-in-laws and always seem to need a card for one of them! I felt that this DSP was the best for the masculine cards I needed. 
You can certainly use any DSP of your choice when making these.


Stack the papers together and make the first cut  lengthwise at 2 1/2". If you don't have the Tabletop Paper Cutter like I have from SU, you need to cut each piece separately.


Turn your first cut, and cut this piece at 3".


With the remaining strips, turn it horizontally, and cut at 2".

Lay the pieces out stacked according to their size. 
This will enable you to have a total of 4 different patterns together.


Seperate each pile and arrange the pieces so they are pleasing to your eye, 
remembering to have 4 different patterns in each stack. Below is how I stacked mine.


The next thing you will want to do is glue each of the four pieces on a base. I just cut 4 pieces of white CS 4" x 5 1/4" and layered my pieces on that. I was hesitant to layer them directly on the card base with the possibility of them not being straight. I actually had to trim some of my main pieces before placing them on my colored CS. A few were either a little longer or wider.  I'm so happy that I have the tabletop cutter when this type of situation arises.You can cut slivers off the paper with ease.


 After that is completed, just glue the completed section to your 4 1/4" x 5 1/2" card base. 
You can just add a simple punched and stamped design, line the inside and 
make sure you SIGN your creation on the back! 

 I did add a few extras on my cards, but it certainly is not necessary. They can be as quick and simple as you want them to be. Just let your creative juices flow!

Here are mine


I hope you will give this a try. I would love to hear how you have
 enjoyed this and see what you created. Just comment here on the blog.

Have a wonderful and CREATIVE week!


1000 Piece Puzzle

  It is a beautiful puzzle,but we probably will NOT do one again. The 500 pc. ones are much more relaxing. Heres hoping you all have a great...