Showing posts with label TNT Tutorial. Show all posts

Saturday, September 21, 2013

Is TNT Thursday back?


Unfortunately, not yet. 

 I was hoping to be back doing the TNT projects way before now, but that has not happened. Hopefully, by November they will be up again.  
Consider this a TNT even though it's Saturday!

  I am also considering doing a post on Quick and Easy cards for , 
" I haven't got a lot of time to create" stampers. 
That's still in the formative stages as I'm gathering projects to post. 
So stay tuned

 But today I have a quick and simple little project that's been rolling around in my head all this week since I had been working with the Harvest of Thanks stamps.

This little pocket is a simple "Diaper Fold" that has been around for a number of years.
 I thought how cute would these be lying on a napkin on a plate for Thanksgiving used as a place setting for each person attending your holiday celebration.

This certainly could be made with any DSP for any celebration. 
Think Christmas, New Years, Easter, etc.


I have seen these so they can stand by dimpling the bottom, but I wanted them to just lay on the plate.

Below will be photos of the process


 Sweater Weather DSP cut at 6X6 (you can make these larger if you care to)


 The DSP is folded in a diamond shape.
 Point to point making sure you have the design that you want is on the outside.


Take one side of the opened end and fold down leaving a about 3/16 of an inch from the bottom fold.


Using the folded line from the top triangle, fold the right and left side 
of the paper to the center and crease.

There is NO GLUE needed for this project.

This is ow it should look when completely folded.


I stamped the turkey image from the Harvest of Thanks in Crushed Curry then punched just the turkey out using my 1 3/4" Circle Punch.  I completed the project by writing a guests name on Pumpkin Pie CS. I chose to use the flag die from Circle Card Thinlits.

I added glue dots to the flag and Stampin' Dimensionals to the image
 and positioned them on the pocket.

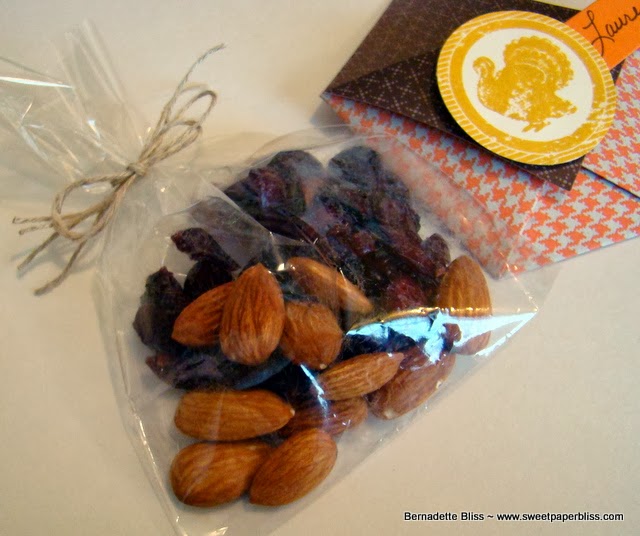
I didn't have any trail mix to add to my SU 4X6 Cellophane Bag, 
but I did have some Almonds and some dried cranberries! I closed the
bag  with a piece of Linen Thread since I am short on ribbon
that would match in my ribbon stash.  

I think a piece of matching ribbon would have made it really pop.
Oh well, that's on the next order!


I hope you give these a try. They really are so quick and would add 
a little WOW to your holiday table.

Have a wonderful weekend and make something CRAFTY!

BERNADETTE

Thursday, June 6, 2013

TNT Thursday


Things have slowed down a little in the past few days with our move, so I was able to put together a TNT Tutorial this week.

This Crisscross Pocket card has been around for some time, but I believe this is the first time I have made one. They are usually made in the horizontal orientation, but this is vertical which is more pleasing to me.

{* My inspiration is from Linda over at stamping School.}


Cut your DSP 6"x12" and score in landscape position at 4" and 8". 
Turn and score at 5 1/2".
The finished outside card will be 4" x 5 1/2"


Cut the paper leaving at each end to the beginning of the middle fold leaving  the center 1/2" middle section in tact. (I used my cutter)

 The remaining piece should look like the photo below


Using your cutter, place your card stock on the platform and line up the top left corner of one section and the bottom corner in the channel to form a triangle, and cut. Do this with the remaining side.


This is the shape that you will have when have completed the cutting


I like to have all my pieces cut before I move ahead. I also stamped the images, cut the ribbon, embossed and used an edgelit on the black paper.


Now you can start folding and adhering the card base


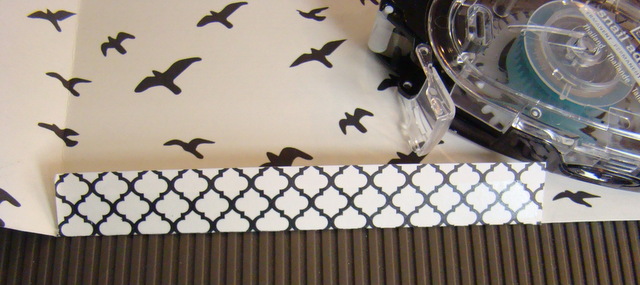
 Run SNAIL along the center fold making sure that the you avoid gettingt  adhesive on the back of the card.


You will just need to run the SNAIL up part way on the opposite triangle 
and along the bottom. With the card facing you, fold the right 
hand side over and then the left side. Press to seal

**When you are scoring the DSP, make sure you use a light touch with the scoring tool. This type off paper is more fragile then the SU Card Stock.
 I'm telling you this from experience!

I rounded the top corners of the vertical fold card, tag and
 the layered tag piece.


Now you can start embellishing the outside and the tag.


I added the ribbon under the cut images and used the new Mosaic Punch to fill in two of the Mosaics on the embossed belly piece.The Medallion from the Happy Day stamp set was cut with my 1 3/4" Circle punch and layered with small medallion from the A Round Array and punched with the 7/8" Scallop.
 I added Stampin' Dimensionals to both medallions and
adhered them over the ribbon.


I stamped my sentiment and added two extra small medallions to the tag. My ribbon on top was just folded in half and adhered with Glue Dots and I added the punched piece to cover the ribbon ends.

I hope you have enjoyed this tutorial and will give this cute card a try!

I'm not sure how my time will be next week. We will be moving into our home, waiting for delivery of furniture, etc. and 
almost ALL my stamping supplies will be packed in boxes. 
I will be posting when I'm able to let you know what I'm up to.

Have a great weekend and stay CRAFTY!

BERNADETTE

1000 Piece Puzzle

  It is a beautiful puzzle,but we probably will NOT do one again. The 500 pc. ones are much more relaxing. Heres hoping you all have a great...