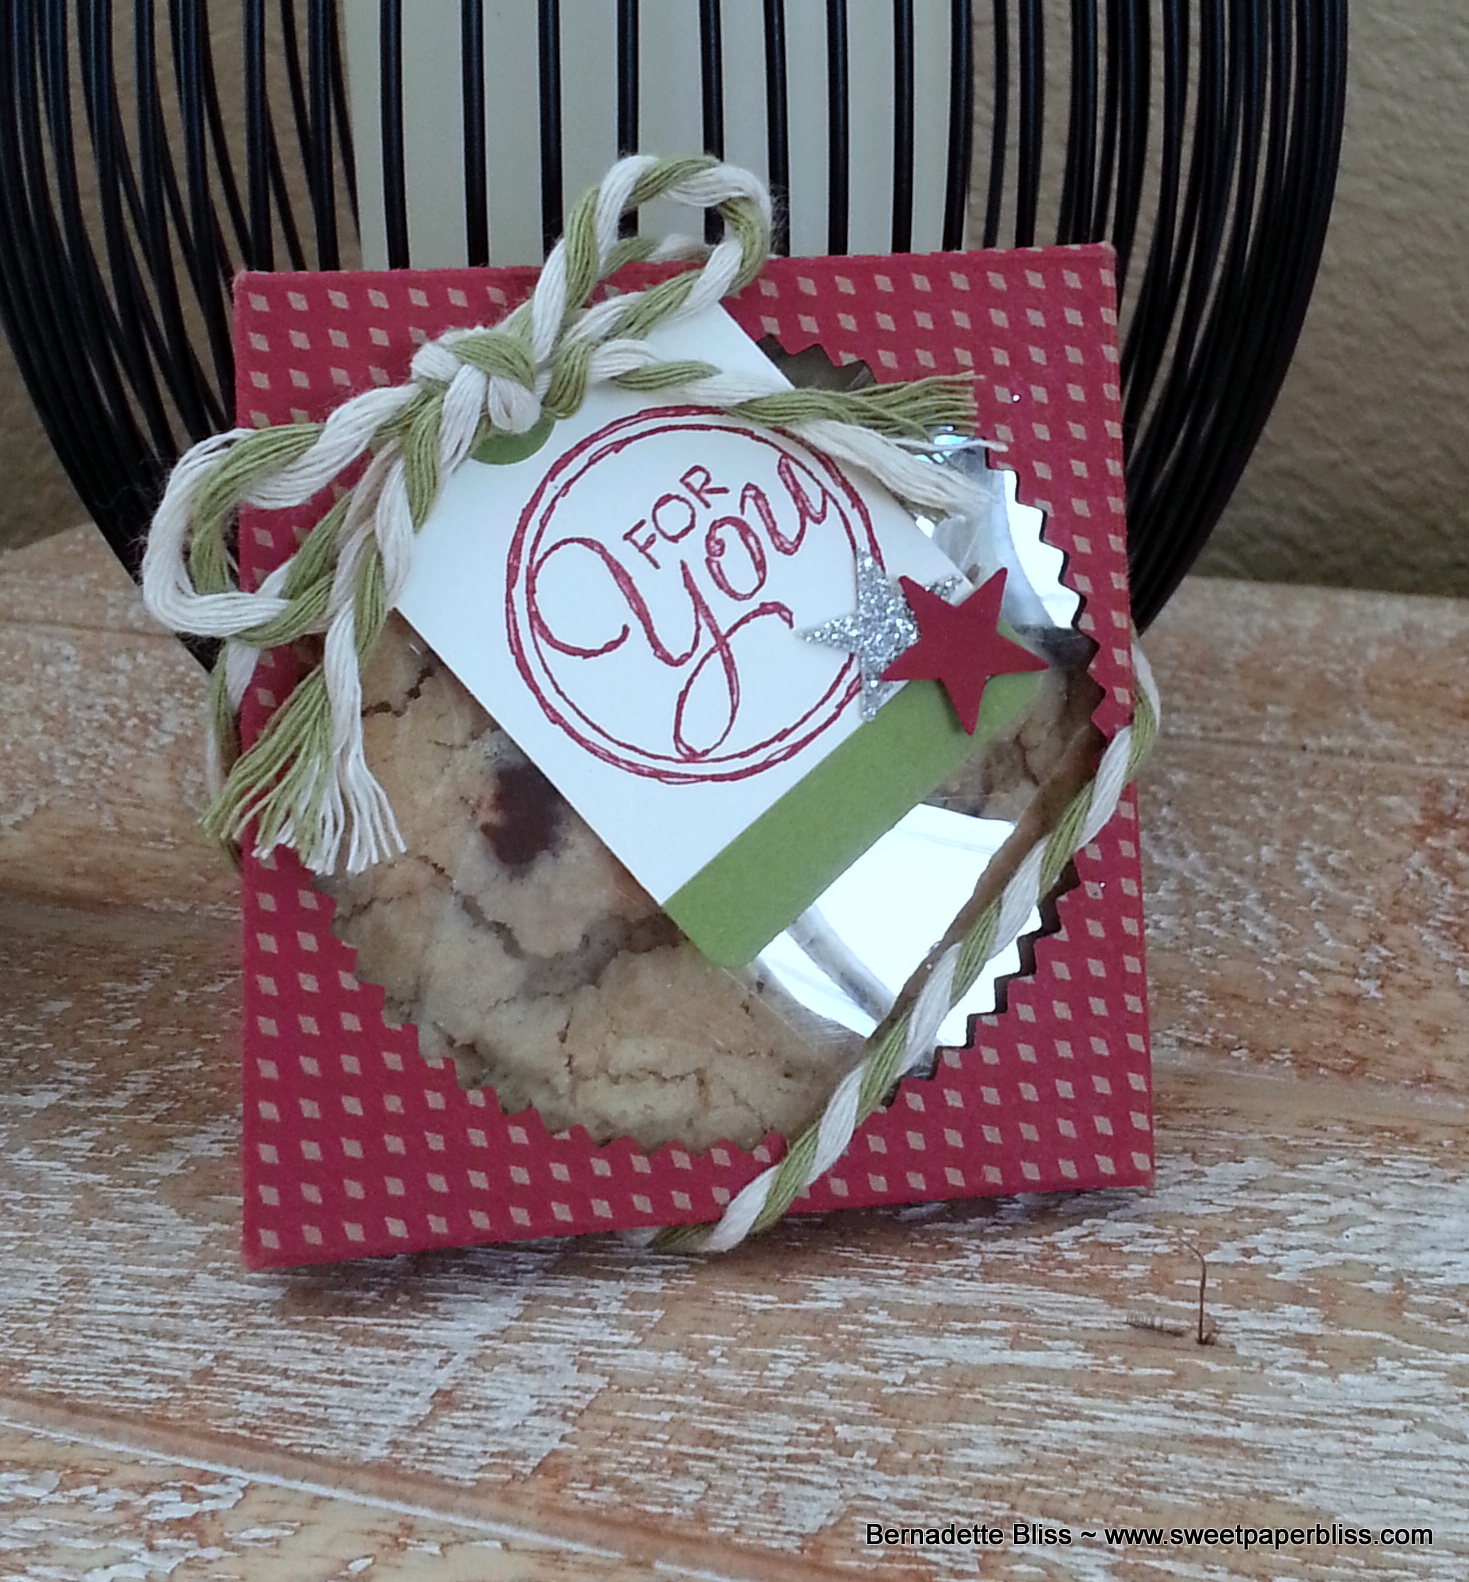
Todays project is made using the Envelope Punch Board by Stampin' Up!. I had been looking through YouTube videos for different ideas using it. I came across this little Cookie Box by Deb Valder. I loved it and thought what perfect little gift for giving my specialty Chocolate Chippers.
I must say, the new Under the Tree DSP, is wonderful to work with. I hope SU continues to offer it after the Holidays, perhaps in Spring patterns and colors. :')

To create the cookie holder, I used the measurements for the card size, 3x3. To give it the depth that I needed, I cut the paper at 6x6.
My first score was at the 2 5/8" score line like the board shows. The next step was to get the added depth to fit the cookie. I slid paper down to the 3 5/8", punched and scored.
That was repeated on the remaining 3 sides. Here is a photo of the completed scoring.
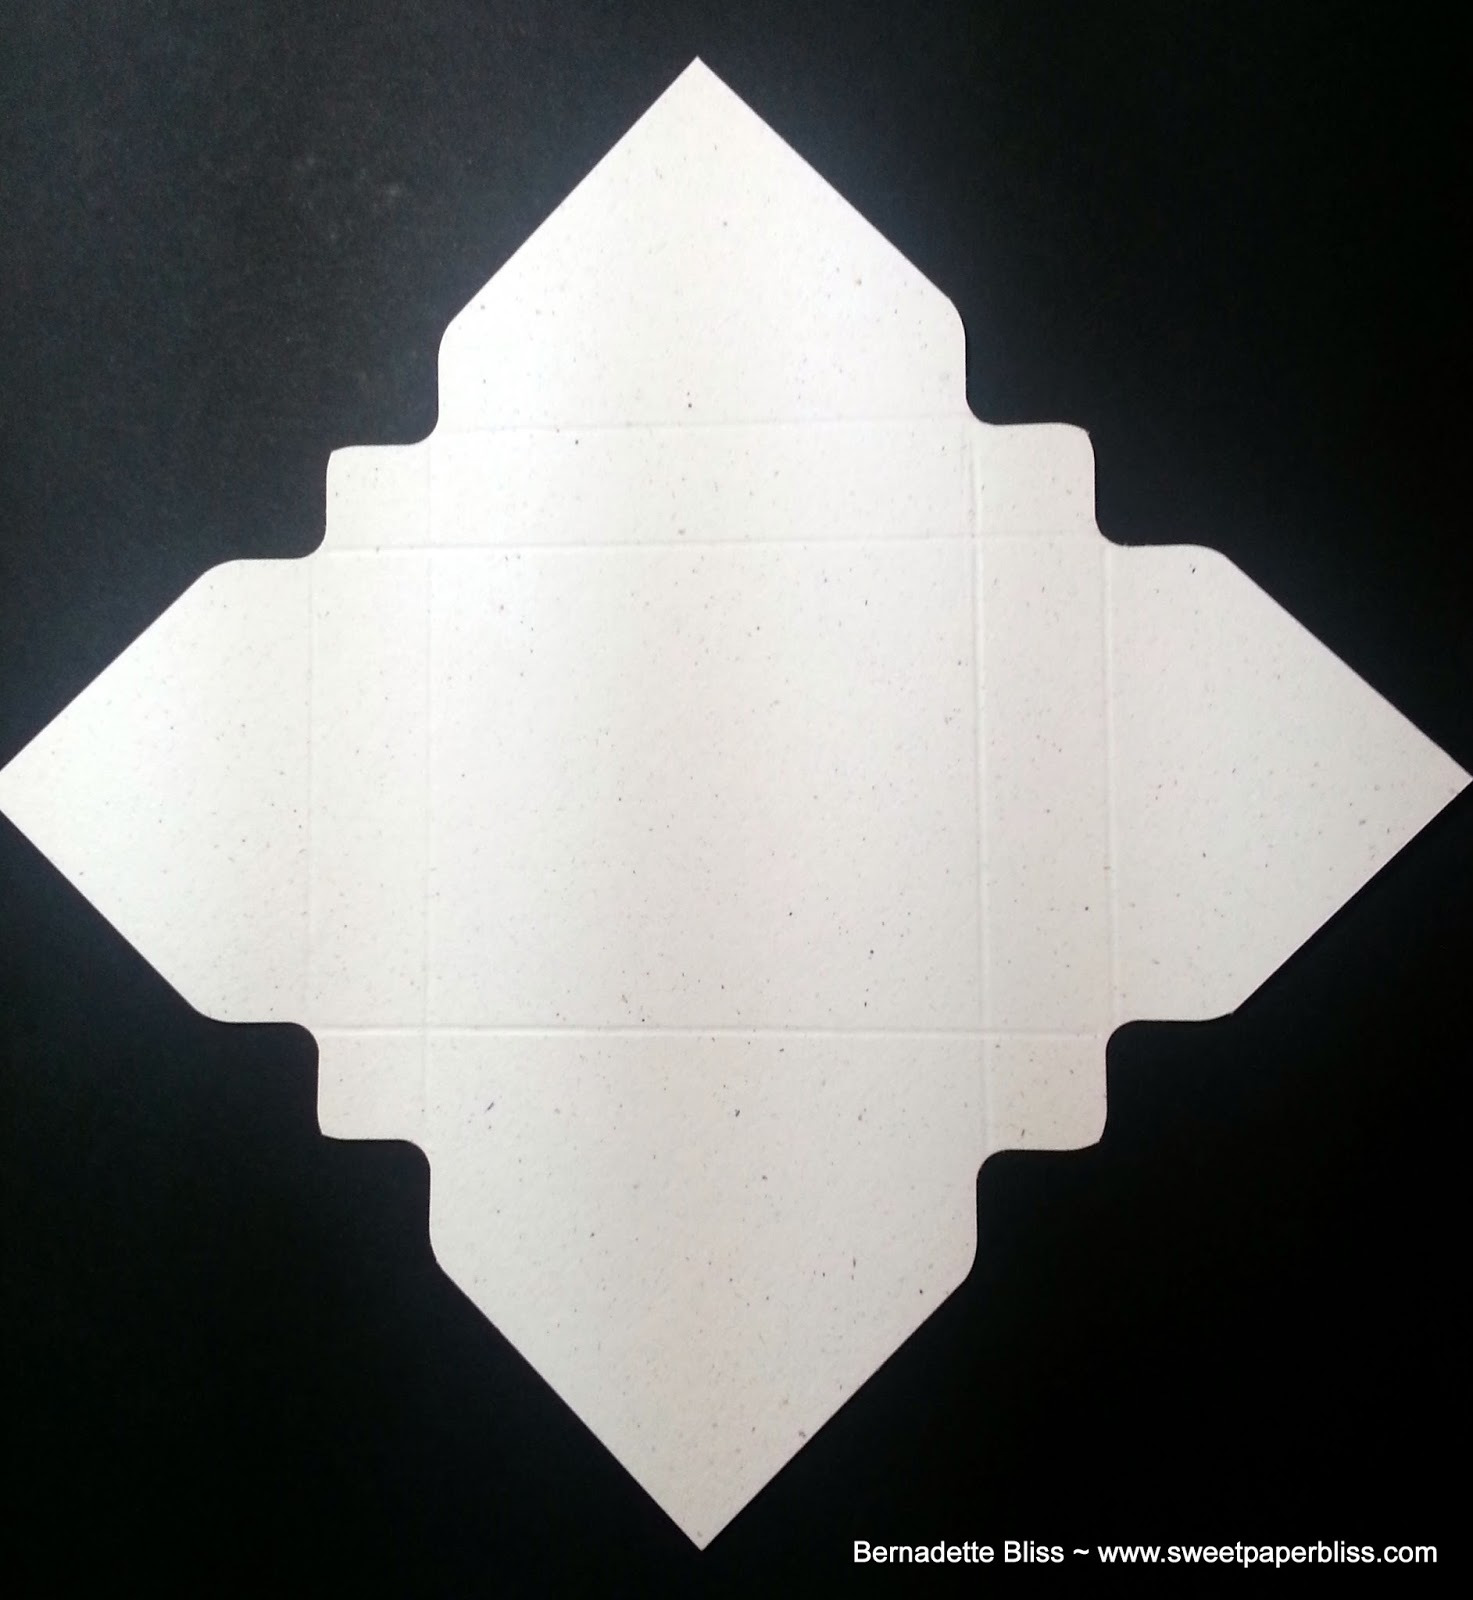
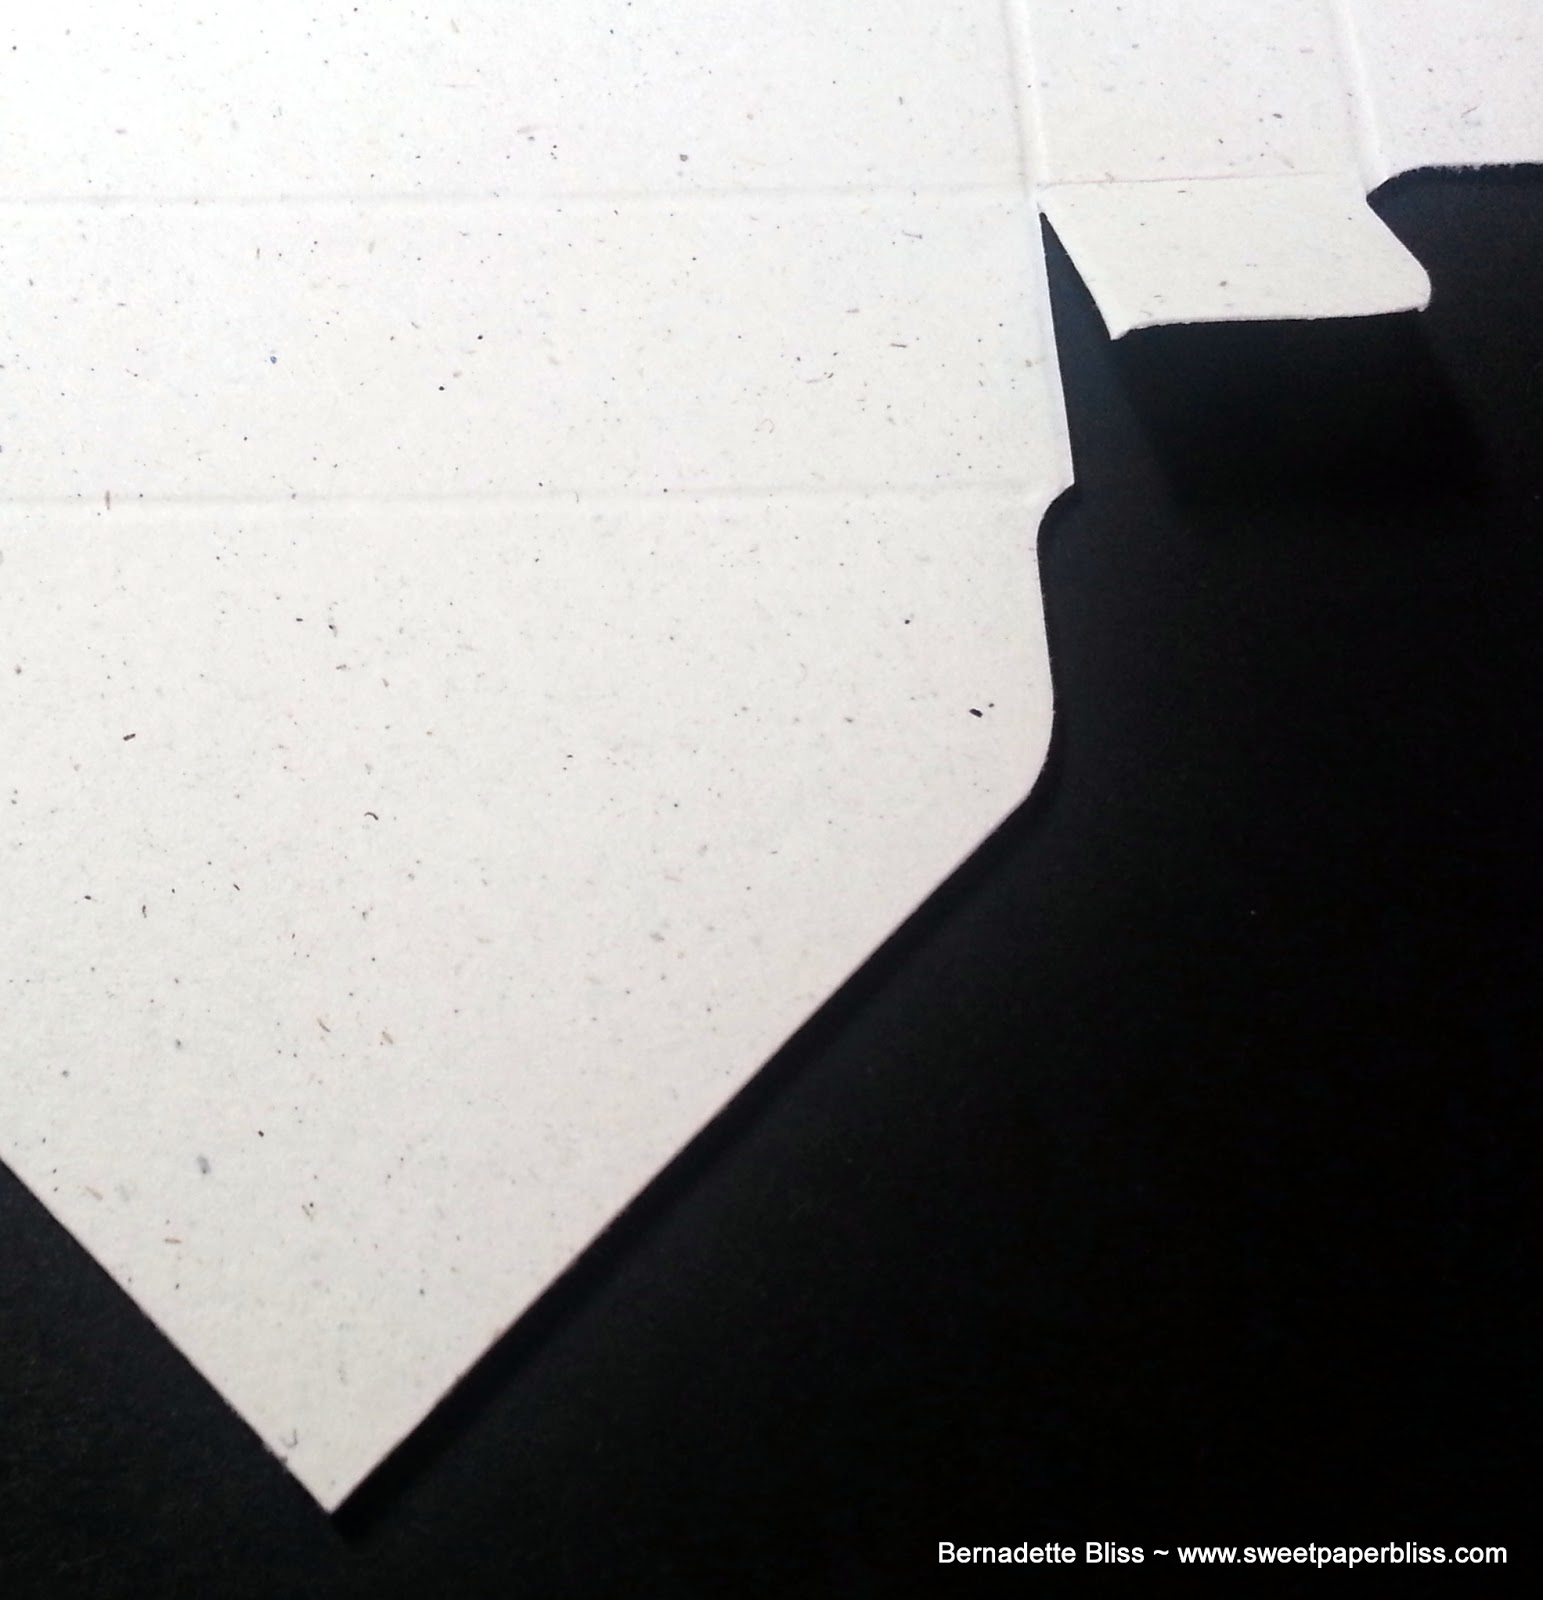
The scored "tabs" were cut on one side up to the diagonal line. There should be 4 tabs cut to form a box.
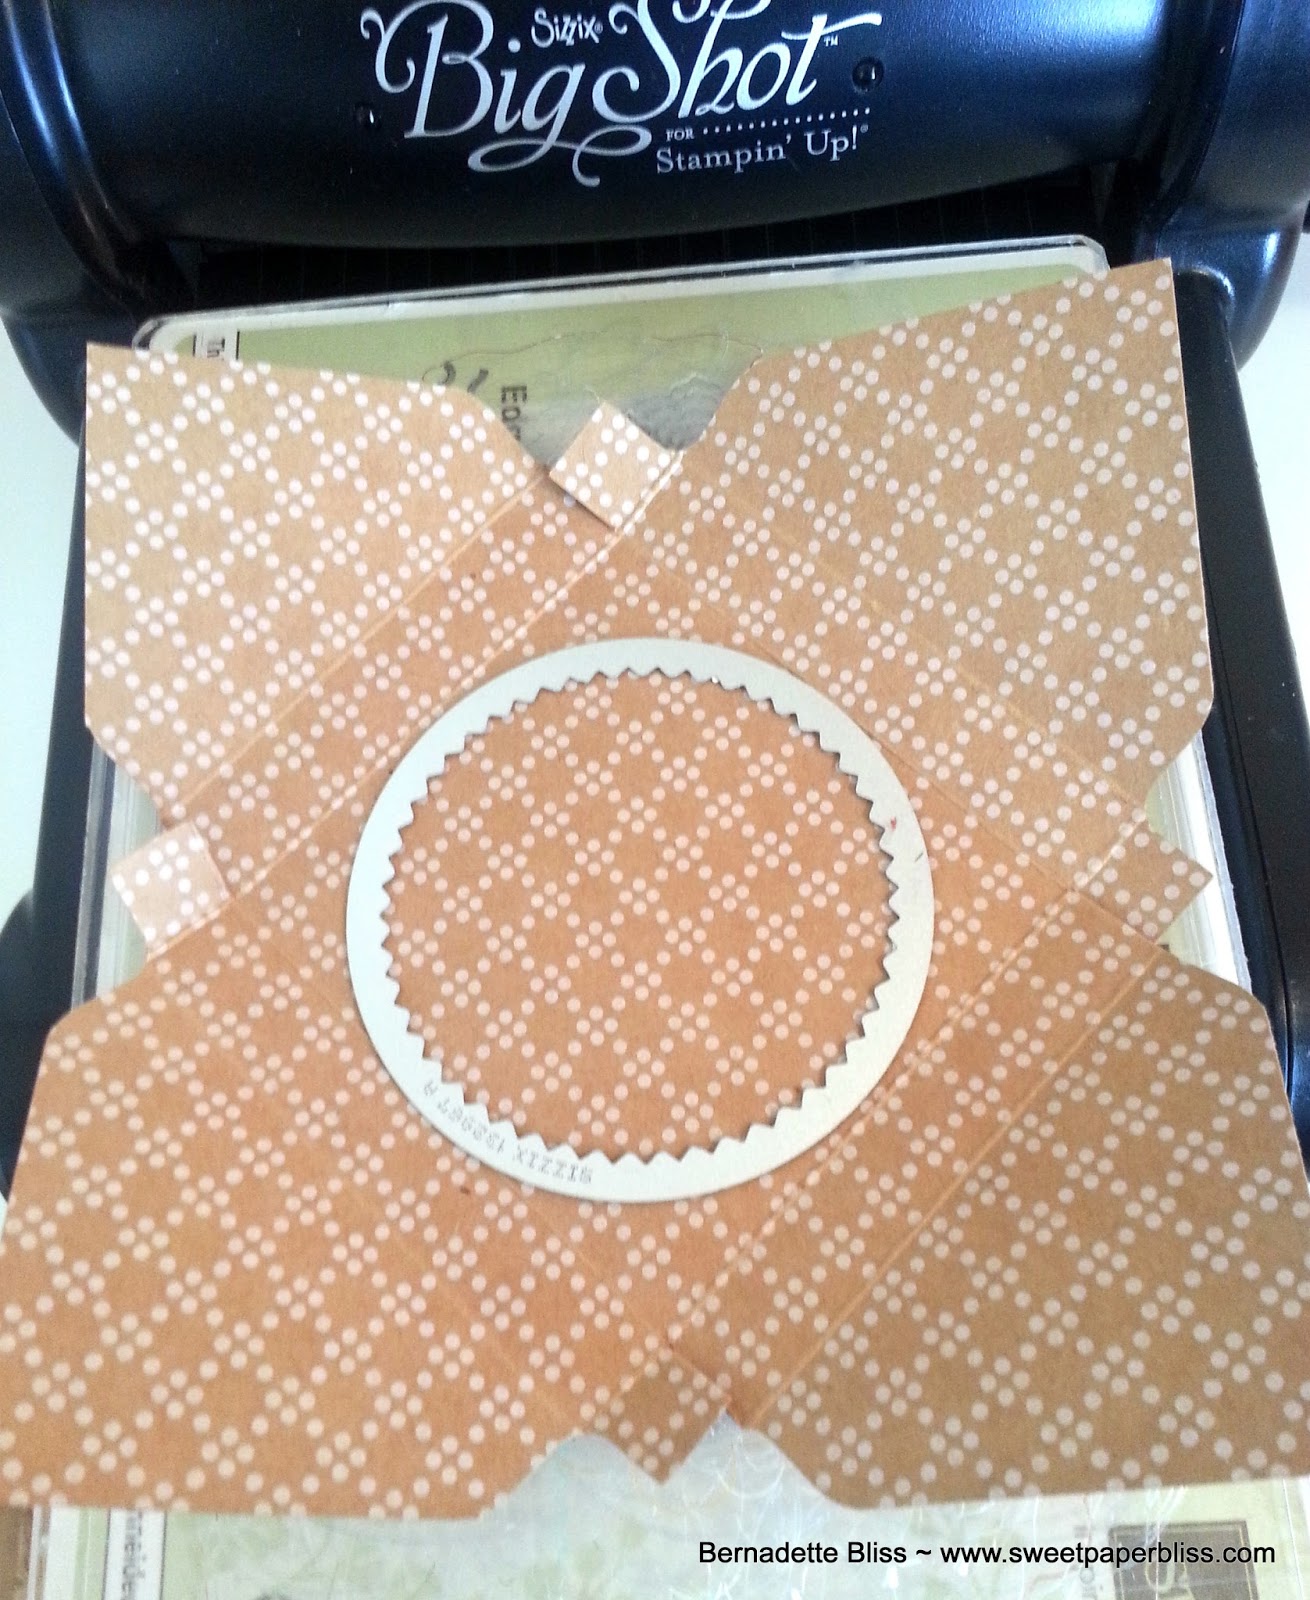
Next was to cut the opening in the middle. I decided to use one of the Starburst dies (#3 size) You can, of course, use what ever shape you care to.
 |
| Back side of DSP |
This size took up most of the area in the middle of the box, but I wanted to show most of the cookie. Plus, attaching a tag would cover more of the cut area.
Since I didn't have Window Sheets, I improvised and used a sheet from one my Photopolymer stamp sets. I cut the sheet a little shy of 3x3 and used just a dab of Fast Fuse on each corner and middle to hold it in place.
Now you are ready to start taping and putting the card-box together leaving one end open and not taped. This will be used like an envelope and to keep it closed.
I found using Fast Fuse or Sticky Strip worked better then Snail or Mono Liquid glue, which was to messy for me.
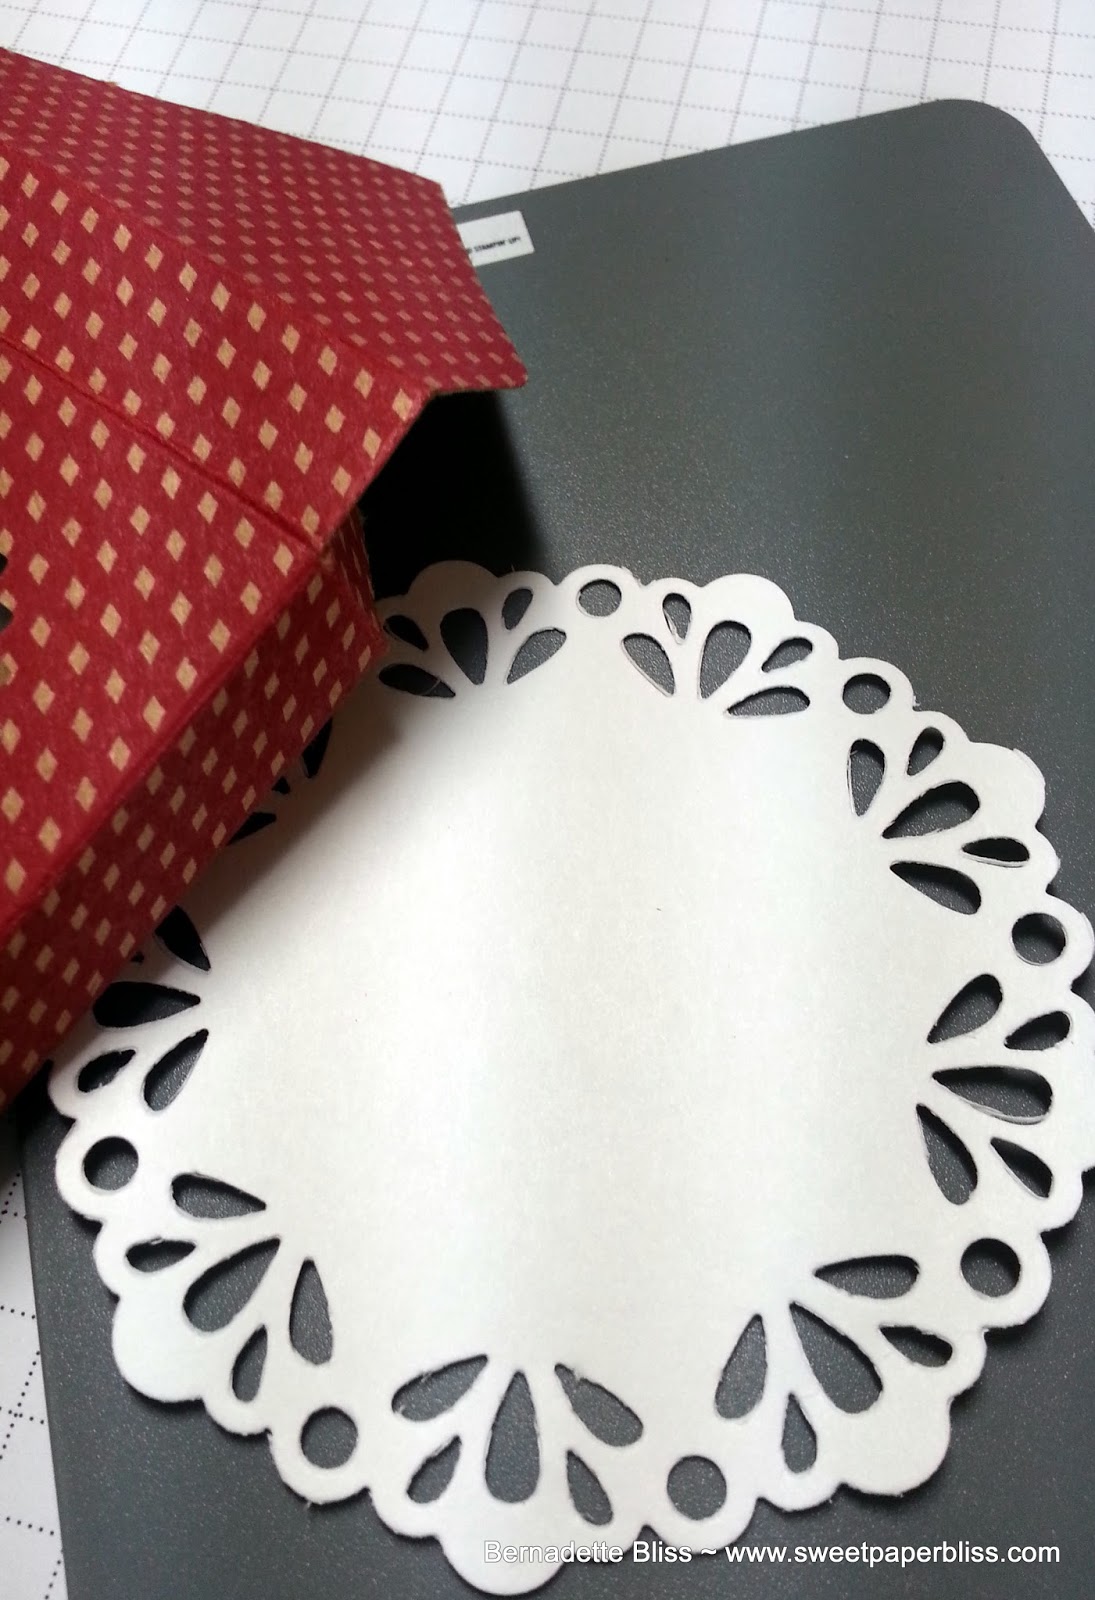
To line the box for gift giving, I added a paper doily using white copy paper and the retired, Large Delicate Doilies. It just fit into the box, but it worked.
I completed the project adding the Natural/Old Olive Trim, a tag cut with the Note Tag Punch, which I love by the way. I can't believe that I almost passed on purchasing it! :) Finishing it with a sentiment from Chalk Talk and 2 stars punched with the Itty Bitty Accents Punch star.
I really enjoyed making this and it did go together fairly quickly. Needless to say, I will be making more.
NOW, I have to give my husband back his cookie! I promised him I was just borrowing it for the project.
Make it a wonderful Friday, enjoy your weekend, and stay CRAFTY my friends.
Hugs,
Bernadette
My online store if you would like to order any of the products shown in this post: CLICK HERE Bernadette Bliss


1 comment:
Now, this is just too sweet, Bernadette! Love this! Thanks for the tutorial, too! Have a great weekend:)
Post a Comment