Today's tutorial is on a neat way to to get a quick set of 4 cards "up and running". A fellow demonstrator, Jackie Bolhuis, demonstrated this technique last year. I came across it on our SU Stampin Connection site and knew I needed to try it myself and share it with my blog friends.
I don't know about you, but I sometimes have trouble mixing and matching patterns. Although Stampin'Up!s papers lend themselves very well to doing that, it usually is out of my comfort zone. This technique allowed me to go outside the box creatively. I hope you will give this a try and see how much fun it can be.


I don't know about you, but I sometimes have trouble mixing and matching patterns. Although Stampin'Up!s papers lend themselves very well to doing that, it usually is out of my comfort zone. This technique allowed me to go outside the box creatively. I hope you will give this a try and see how much fun it can be.
Lets get started
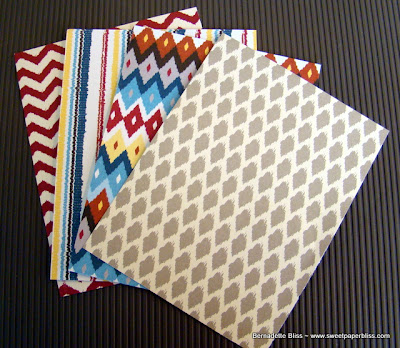
Pick four sheets of Designer Paper and cut them at 4 x 5 1/4" each. I chose to use Parker's Patterns from the Spring Catalog. I have three sons and three son-in-laws and always seem to need a card for one of them! I felt that this DSP was the best for the masculine cards I needed.
You can certainly use any DSP of your choice when making these.

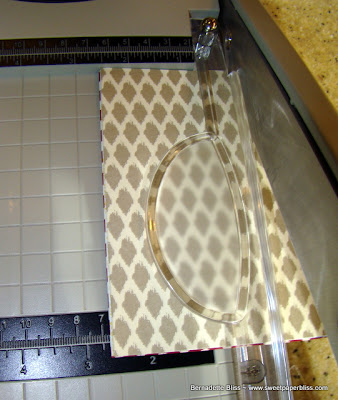
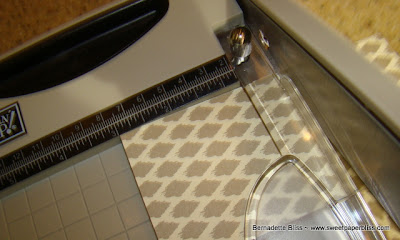
Stack the papers together and make the first cut lengthwise at 2 1/2". If you don't have the Tabletop Paper Cutter like I have from SU, you need to cut each piece separately.

Turn your first cut, and cut this piece at 3".

With the remaining strips, turn it horizontally, and cut at 2".
Lay the pieces out stacked according to their size.
This will enable you to have a total of 4 different patterns together.

Seperate each pile and arrange the pieces so they are pleasing to your eye,
remembering to have 4 different patterns in each stack. Below is how I stacked mine.

The next thing you will want to do is glue each of the four pieces on a base. I just cut 4 pieces of white CS 4" x 5 1/4" and layered my pieces on that. I was hesitant to layer them directly on the card base with the possibility of them not being straight. I actually had to trim some of my main pieces before placing them on my colored CS. A few were either a little longer or wider. I'm so happy that I have the tabletop cutter when this type of situation arises.You can cut slivers off the paper with ease.

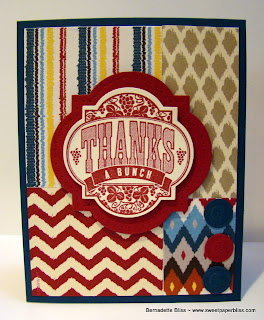
After that is completed, just glue the completed section to your 4 1/4" x 5 1/2" card base.
You can just add a simple punched and stamped design, line the inside and
make sure you SIGN your creation on the back!
I did add a few extras on my cards, but it certainly is not necessary. They can be as quick and simple as you want them to be. Just let your creative juices flow!
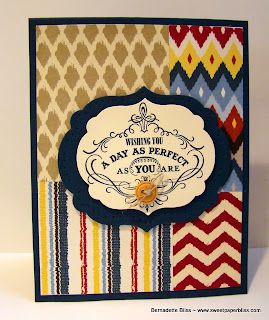
Here are mine


I hope you will give this a try. I would love to hear how you have
enjoyed this and see what you created. Just comment here on the blog.
Have a wonderful and CREATIVE week!


1 comment:
Interesting, Bernadette. I like this technique of creating cards- putting in my inspiration file...
Post a Comment